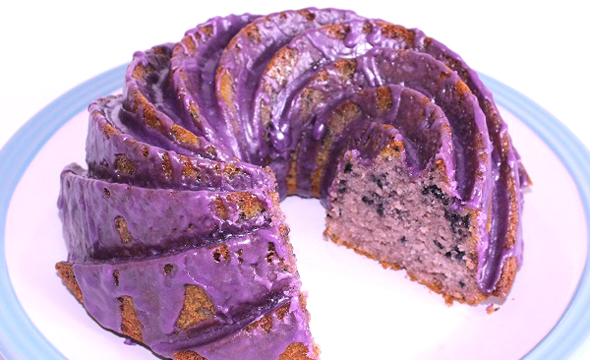
Gluten & Dairy Free Blueberry & Vanilla Bundt Cake
It’s hard to believe that this delicious Blueberry & Vanilla Bundt Cake is both gluten free and dairy free, but it is! It’s moist, fruity and soooooo tasty!
Ingredients
For the Cake
- 125 g Dairy Free Spread I use Vitalite
- 1 tsp Vanilla Extract
- 225 g Caster Sugar
- 100 ml Vegetable Oil
- 4 x Eggs
- 225 g Gluten Free Self-Raising Flour Blend I use Doves Farm
- 1 tsp Gluten Free Baking Powder
- 150 g Blueberries
- A Few Drops of Violet / Purple Gel Food Colour I use Sugarflair Grape/Violet
For the Icing
- 150 g Icing Sugar
- 2 tbsp 30ml Water
- ½ tsp Vanilla Extract
Instructions
- Thoroughly grease a bundt cake tin with dairy free spread using a pastry brush to get into all of the nooks & crannies & pre-heat the oven to 325° F / 160° C / 140° Fan / Gas 3.
- Place the blueberries into a food processor / blender for a few seconds until they become a think liquid with small lumps (not completely smooth) and then put to one side.
- Place the dairy free spread & vanilla in a large mixing bowl and mix together.
- Add the caster sugar and cream together.
- Then add the oil and beat together until lump free and smooth.
- Add the eggs & beat together again.
- Add the flour & baking powder & mix until combined.
- Add the liquidised blueberries and mix thoroughly.
- Finally add a few drops of purple colouring and again mix thoroughly.
- Transfer the batter into the tin & bake for 45-50mins, or until a skewer comes out clean.
- Remove from the tin and place on a wire rack to cool and make the icing.
- Place the icing sugar, water & vanilla in a jug and mix thoroughly until smooth and lump free, then add some of the purple colouring and mix again until no white is left.
- When the cake is almost completely cool, place a plate underneath the cooling rack to catch any drips and careful pour the icing over the top of the cake so that it runs down the sides.
- When the jug is empty you can keep scooping up the drips from the plate and re-using them until the cake is almost completely covered.
- Serve and enjoy!
Made this recipe? Don't forget to tag me!@itssarahsibley I love to see all your tasty creations!